Set Up Doxie Q
- Insert Doxie's included SD memory card.
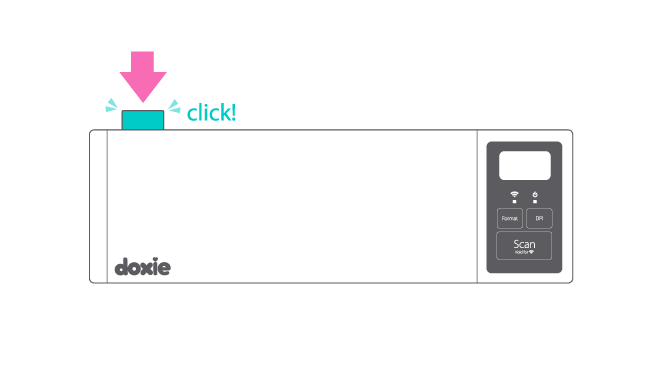
If your model comes with a micro SD card and an adapter, be sure to insert the micro SD card into the adapter first. - Remove the protective plastic film from Doxie's touch-sensitive control panel.

- Remove the protective packaging inside Doxie.
Open Doxie's top cover, then open the interior cover by lifting up the center. Dispose of the protective orange packing tape over the pick roller, along with the affixed black pad.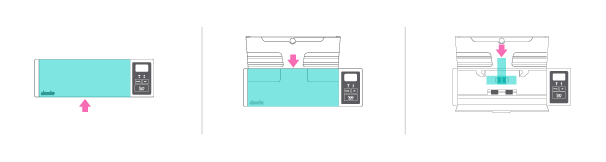
Squeeze the two indicated tabs inward and pull up on the inner panel cover. Remove the protective plastic seal from the battery by pulling the red tab.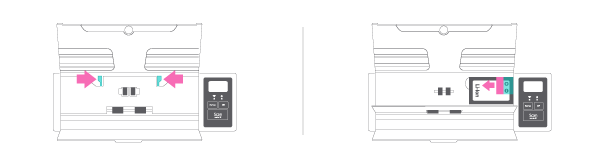
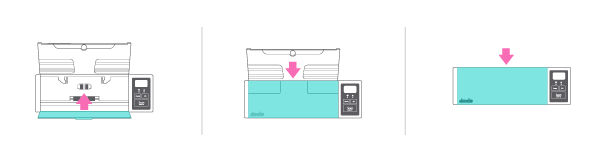
- Close the inner panel, the interior cover, then the top cover.
- Connect Doxie to wall power, or your computer to charge for the first time.
Plug Doxie into a power outlet with the included power adapter. The power light turns green – you can set up and use Doxie while it charges. When Doxie’s battery is fully charged, the power light turns off.
That's it! Now you're ready to scan. Next, learn more about scanning...
Need a hand?
If you have any questions about setting up Doxie Q, please contact Doxie Customer Care, and we'll be more than happy to help!