I can't find Doxie after installing / Installation troubles on Mac
Can't find Doxie after installing?
On Mac, installing Doxie is a two-step process:
- Download and open the disk image — this is the
.dmgfile you downloaded. Opening it shows a window with the Doxie icon. - Drag the Doxie icon into the Applications folder — this is the actual installation step. Until you do this, Doxie isn't truly installed.
Once Doxie is in your Applications folder, you can find it by:
- Opening Finder and clicking Applications in the sidebar
- Or using Spotlight (Command + Space) and typing "Doxie"
After you've dragged Doxie into Applications, you don't need the disk image anymore — eject it by clicking the eject icon next to it in Finder's sidebar.
If you're not sure whether you completed the installation, follow the step-by-step instructions below.
Step-by-step installation
Click this link to start the software download. Once the Disk Image file (Doxie-3.1.dmg) has finished downloading, open it.
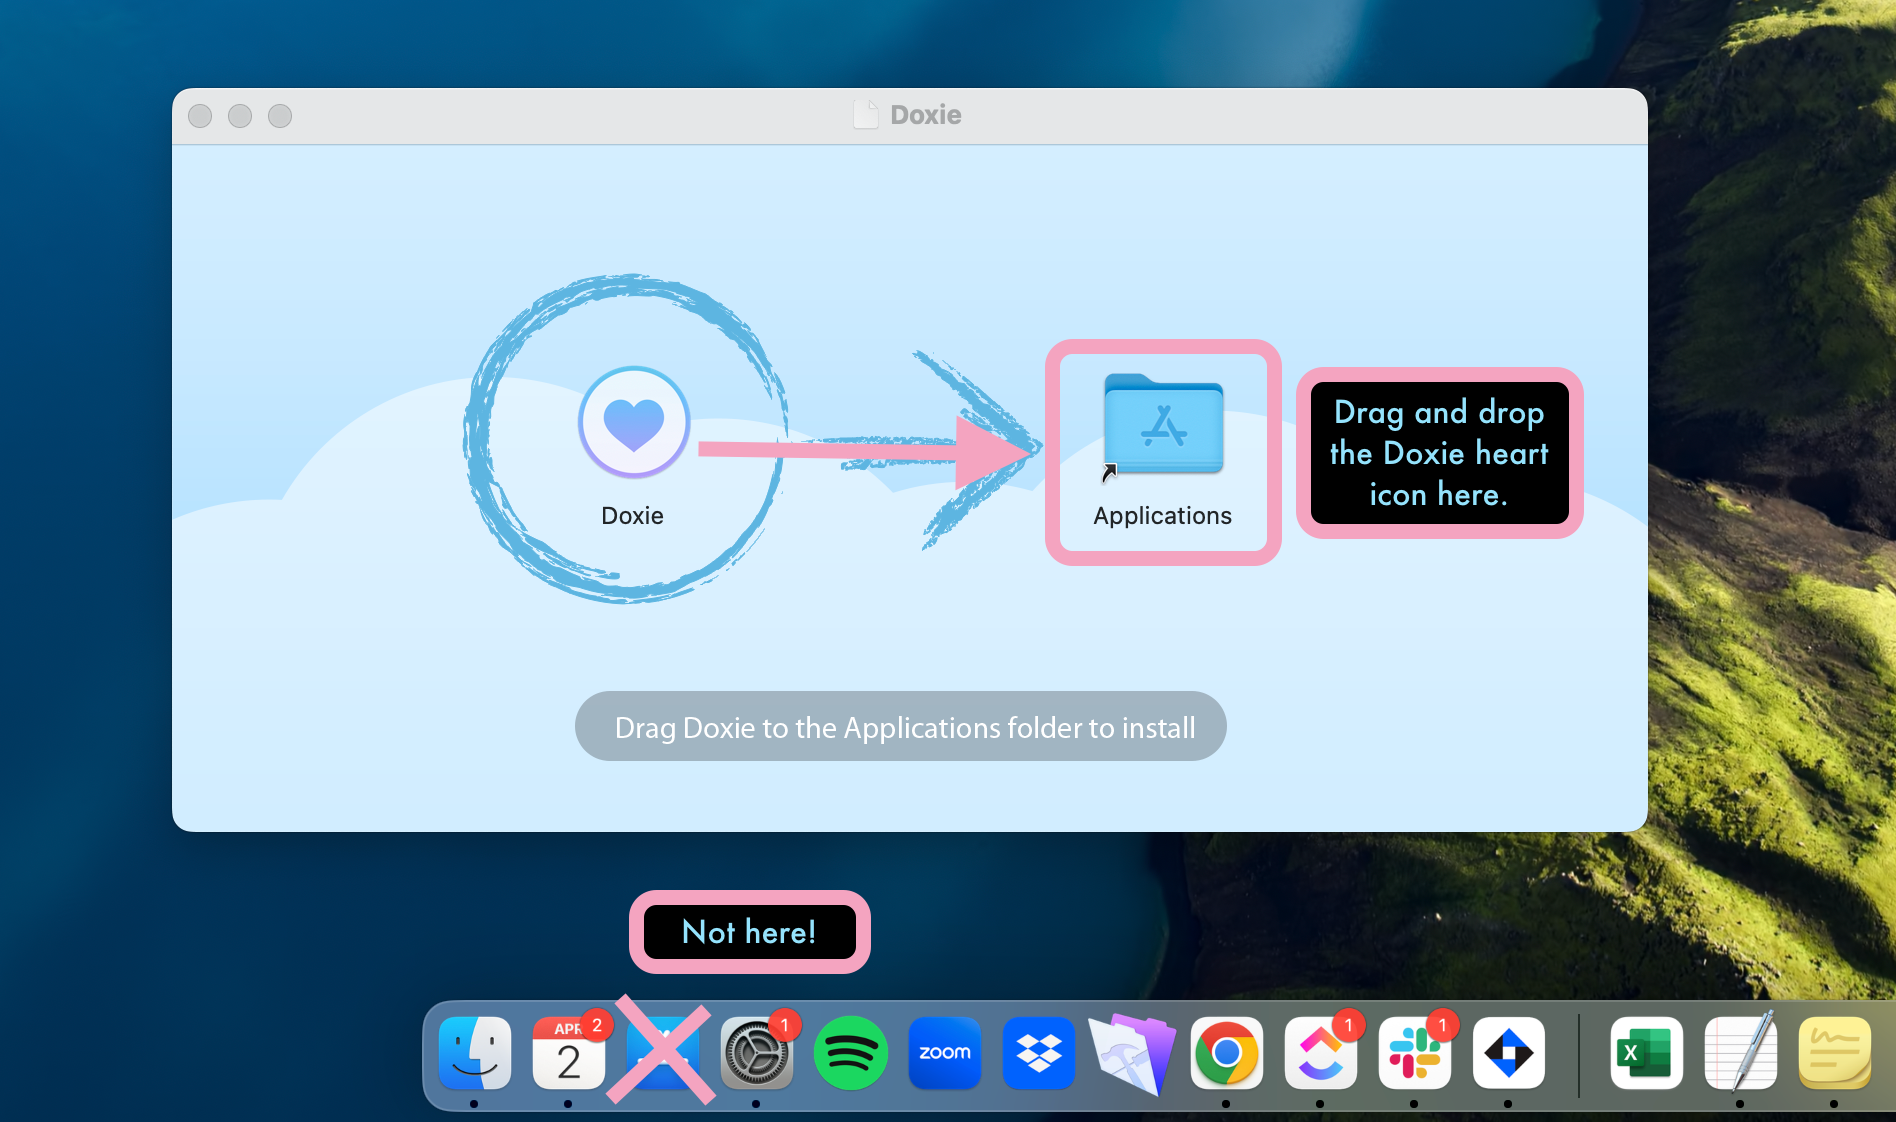
You should see the pop-up window below. Be sure to drag and drop the heart icon into the Applications folder immediately to its right.
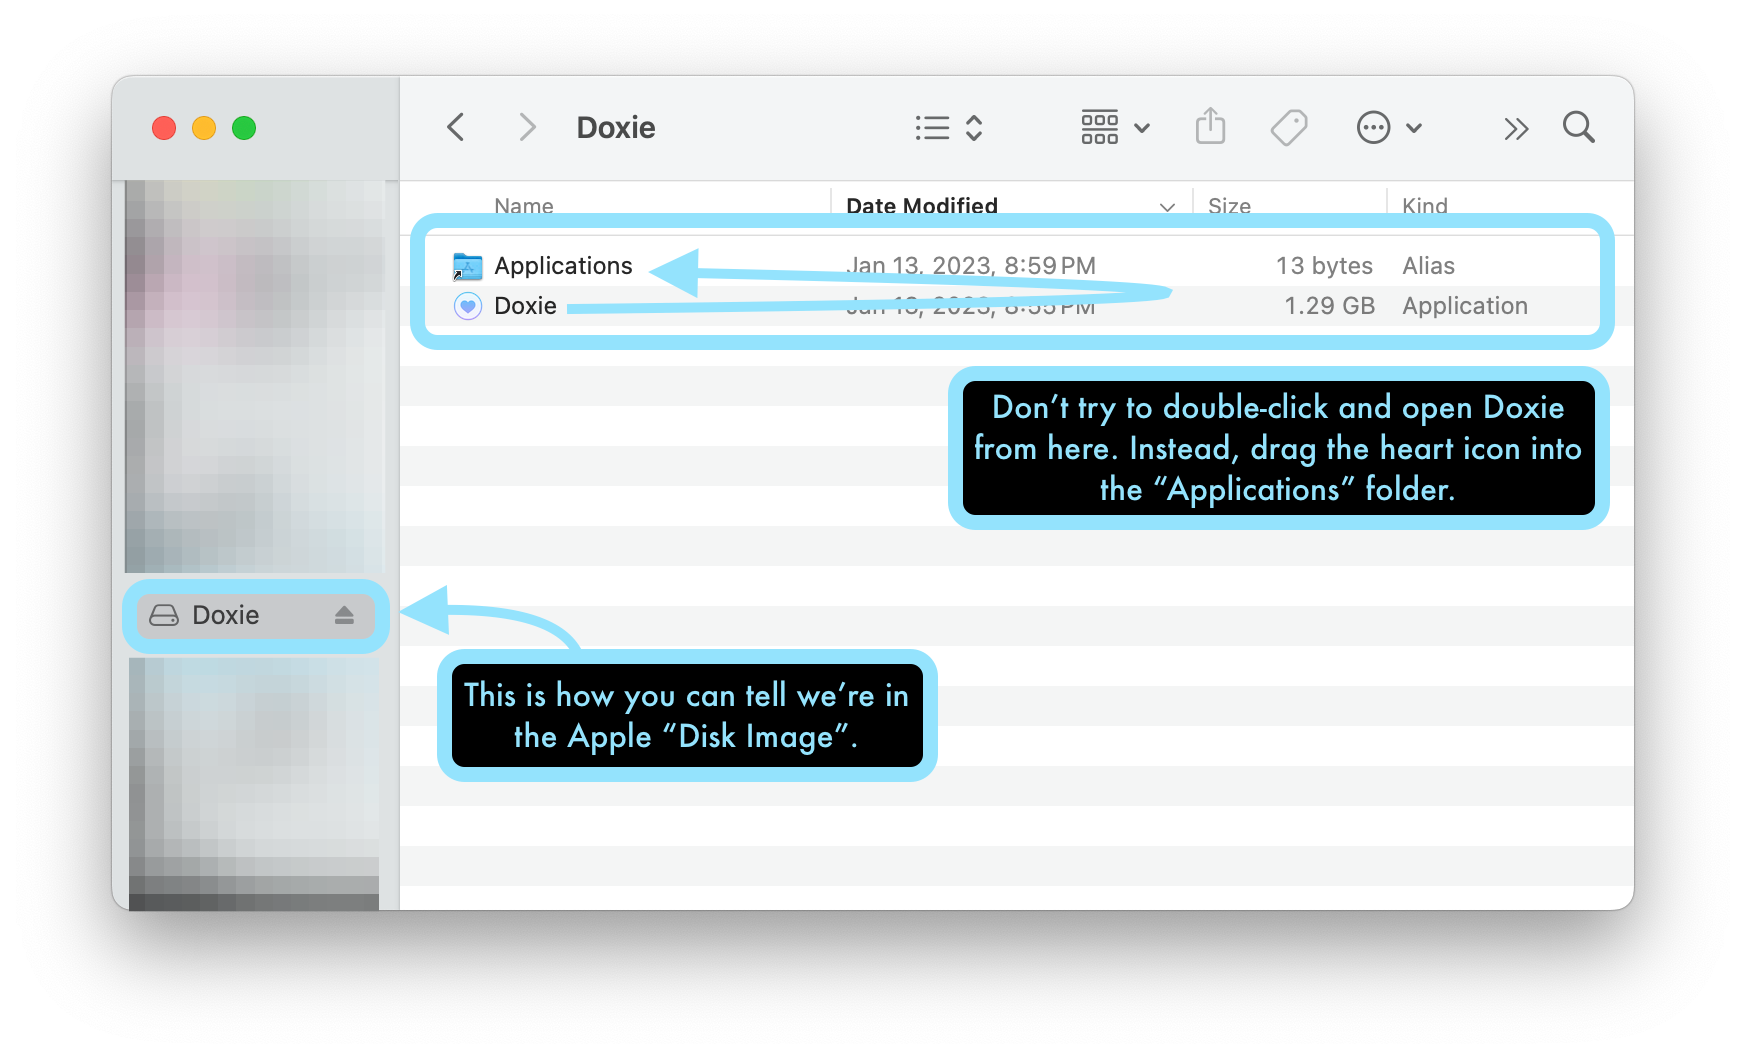
Or you might be seeing a window that looks like this -- we can tell we're in the Disk Image and not in Application because of the left-hand menu. If this is what you see, don't try to launch the Doxie software from here -- just drag and drop it into the "Applications" folder right above it.
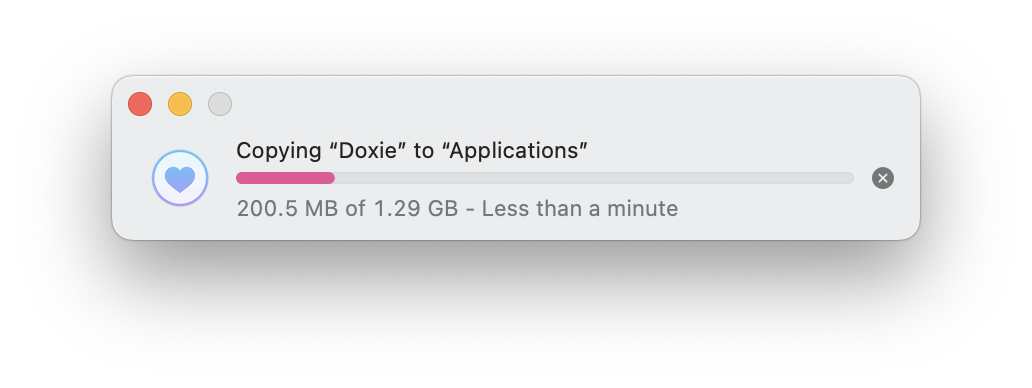
Once you've successfully dragged and dropped Doxie into the Applications folder, you should immediately receive this pop-up stating that Doxie is being copied to Applications:
Next, launch Doxie from your system's Applications folder.
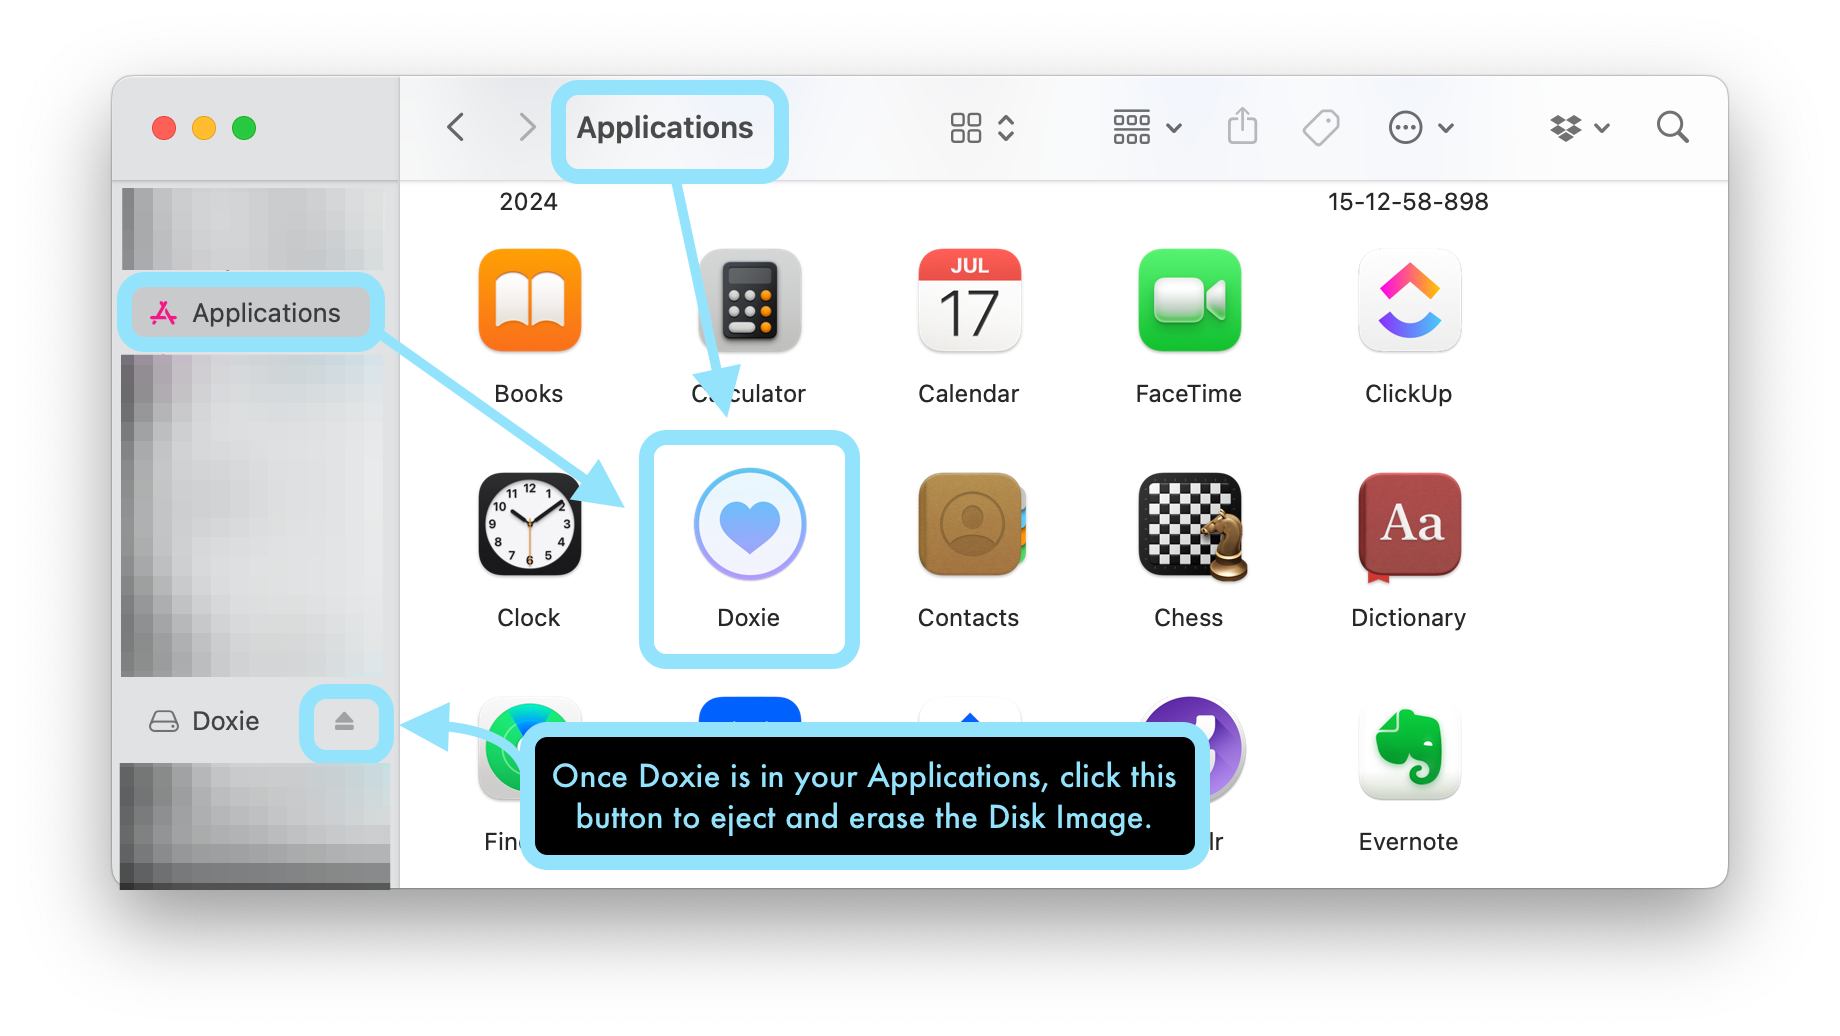
Once Doxie is in your Applications, click the Eject icon to eject and erase the Disk Image.