Import Scans
To import scans via Wi-Fi to your iPhone or iPad:
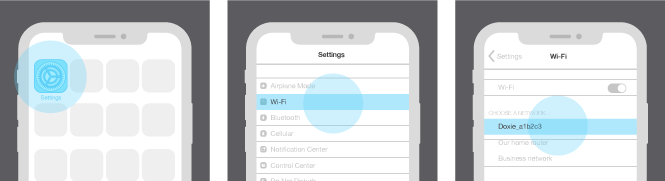
First, join Doxie's network
- Turn on Doxie. Move the on/off switch to the on position.
- Enable Wi-Fi. Turn on Wi-Fi by holding down the Scan button for a few seconds until the Wi-Fi symbol appears on the LCD screen. Wait for the blue LED light to appear.
- ... then join Doxie's network. Open Settings, tap Wi-Fi, and select Doxie's network. If you've configured Doxie to connect to your local Wi-Fi network (optional), join that network instead – you want to be on the same network as your Doxie.
Importing scans from Doxie for iOS
- Launch Doxie for iOS.
- Tap the + icon on the top bar.
- Tap your Doxie from the scanners list. If you can't see your scanner, pull down to refresh the list.
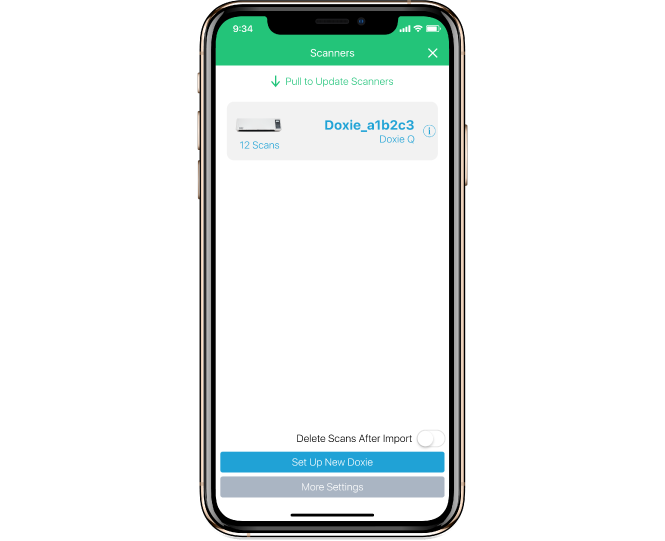
If you are importing for the first time, and the Wi-Fi network on your Doxie is protected by a password, the app will prompt you to enter it. The app will save the password automatically.
- The app will show a list of the scans on your Doxie. If you have a lot of scans, it may take a while for the thumbnails to appear. Tap on each scan to preview the image before importing.
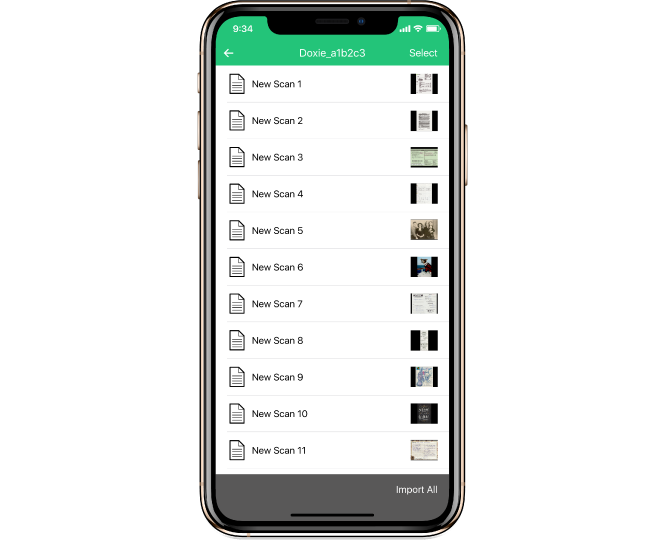
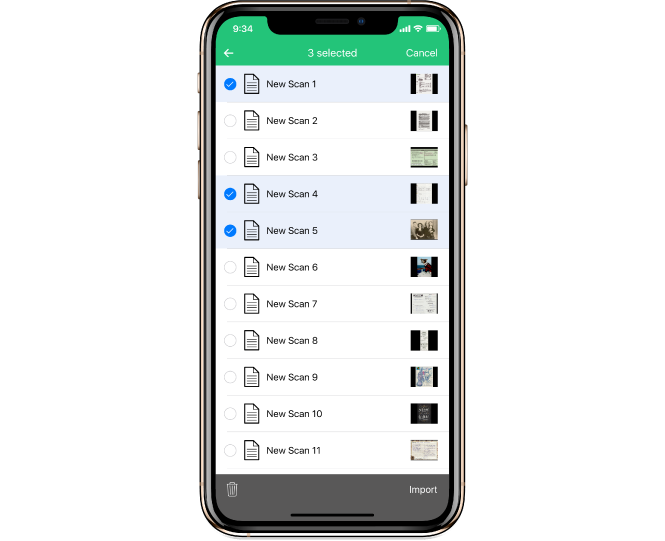
- Tap Import All at the bottom of the screen to import all your scans. If you want to import only some of the scans, select them by tapping Select on the upper right, then tapping the scans from the list. Then tap Import on the lower right.
Need a hand?
We're here to help! Check out the FAQs, contact us for help, or have us call you for personal assistance.