Scanner Overview 
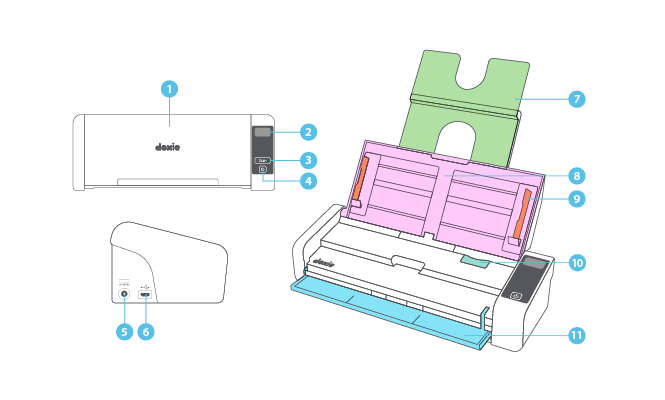
Learn about Doxie Pro's parts, two paper feeding trays, buttons, and ports.
| Function | ||
|---|---|---|
Protects Doxie from dust when closed and not in use
|
||
Displays Doxie's statuses and messages |
||
Starts a scan while connected to Doxie’s desktop software |
||
Turns Doxie on and off
|
||
| Connects Doxie to the included power supply | ||
Connects Doxie to your computer with the included USB cable. Pick the included cable that matches your computer’s type of USB port. |
||
Holds documents of various lengths while scanning with the ADF
|
||
Holds regular printer paper (up to 20 pages) while scanning. Learn how to scan here
|
||
Ensures straight feeding when raised and adjusted to fit the width of your paper — the paper should sit below the guide tabs
|
||
Allows access to the inside of your scanner for unpacking, scanner maintenance, and clearing paper jams or other errors
|
||
Holds single-page items flat while scanning — designed for thick or damaged paper like photos, business cards, drawings, heavily wrinkled paper, and more. Learn how to scan here
|

Need a hand?
We're here to help! E-mail in a question and we'll assist you personally.